If you have some photos you want to share, a quick way to put them into a slideshow is by using PowerPoint 2013. Save the file as a standard PPTX PowerPoint file or format it as a self-generating PowerPoint Show that plays automatically when someone clicks it.
Creating a Photo Slideshow
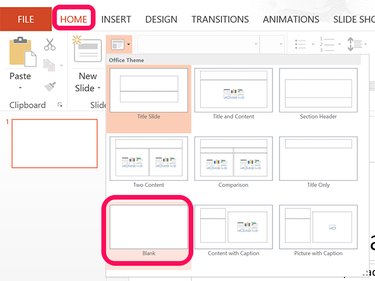
Open a blank PowerPoint presentation. Click the Home menu, click the Arrow at the bottom of the Slides icon and select Layout. Click the Blank icon. Note that if you want to add captions to your photos, or want to put two photos in each slide, you can select another layout.
Video of the Day
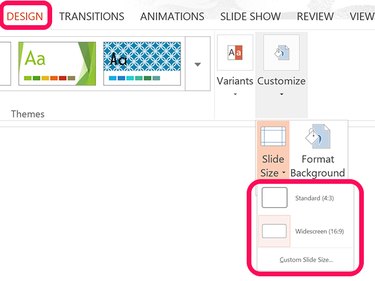
Click the Design tab if you want to change the size of the slides from the default Widescreen 16:9 aspect ratio. Click Customize and then Slide Size and select the Standard 4:3 size or Custom Slide Size.
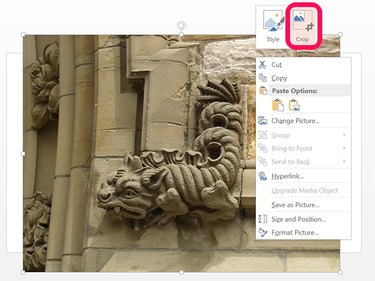
Open a File Explorer window and locate your photos. Drag the first photo onto the slide. Once it's in the slide, drag the photo to reposition it, or drag a corner Handle to resize it. Note that if you drag a handle that centers an edge, you will distort the photo. If you need to crop the photo, right-click it and select Crop. You can then use the handles to move the crop marks. Clicking anywhere off of the photo saves the new crop size.
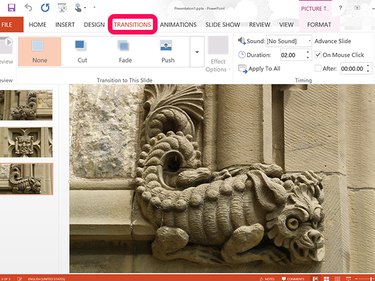
To add more slides, right-click the left Sidebar with the slide thumbnails and select Add Slide. Add as many new slides as you need for each photo. When the photos are all in the presentation, click the Transitions menu and use the options in the Ribbon to change the transition style between slides, set the time each slide should play and define whether the viewer should be able to advance to the next slide with a mouse-click. Clicking the Slide Show menu gives you additional options for previewing and customizing the slideshow.
Emailing and Sharing the Slideshow
When the slideshow is all set up, you either save it on your computer and then email it as an attachment, or save it to OneDrive and email the link. Your friends don't need Microsoft Office to view the slideshow.
If you're saving the slideshow to your computer, click the File menu and select Save.
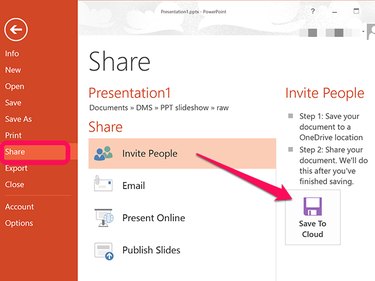
To create a sharable link, click the File menu, select Invite People and then click the Save to Cloud button.
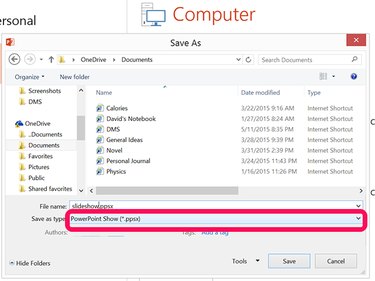
Select a location and a file name for the slideshow. If you want to create a self-opening PowerPoint Show, click the Save as Type menu and select PowerPoint Show (*.ppsx). Otherwise, save the file as a standard PPTX file, which anyone who has PowerPoint can open.
Other Slideshow Options
PowerPoint 2013 has options to burn a presentation to a disc or export it as a video. Just click the Video icon after clicking the File menu.
PowerPoint Online has the tools you need to create a slideshow from your photos too. While you can't save it as a PowerPoint Show, you can download the PowerPoint Presentation PPT file to send via email. The only difference is that they will have to click the Slideshow button on the presentation themselves.
If you have a free Gmail or Google account, create a slideshow using Google Docs.
Any computer with Windows from Vista to 8.1 can play its own slideshow. Put the photos in a single folder, right-click one of them and select Preview. Clicking the Slideshow button at the bottom of the Preview window starts the slideshow for all photos in that folder.