Whether they are created manually or exported from another software application, delimited files are a commonly used to store important data. The trouble with data is that it is not very valuable unless you have some way to manipulate and study it. While delimited files are a nice way to store data, it’s not very practical to try to study the data in the raw form of these files. Importing the delimited file into Microsoft Excel will allow you to use all the tools of Excel to analyze your data and to present the findings of your analysis in a clear manner.
Step 1
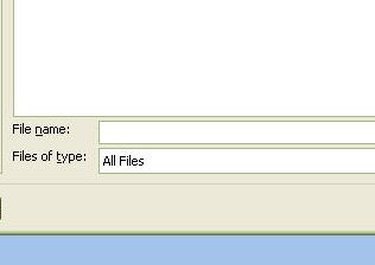
Choose “Open” from Microsoft Excel’s File menu, and navigate to the folder that contains your delimited file. Make sure that you have chosen the option to view all file types. If you don’t do this, you will not be able to see your file in the folder. Double-click on the file name to open it. Excel will automatically enter “Text Import Wizard” mode.
Video of the Day
Step 2
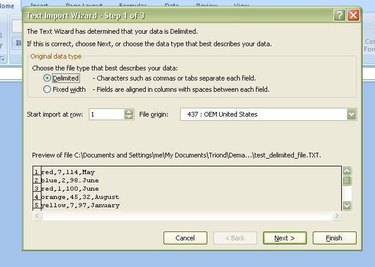
Choose “Delimited” as the file type that best describes your data on the first screen of the Text Import Wizard. Then click “Next” to go to the next screen.
Step 3
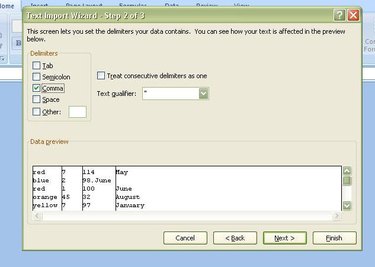
Select the delimiter that is used in your delimited file. If you didn’t know what the delimiter was before beginning the file import, you can usually scan the data and determine which character is being used. In our example, the file is comma-delimited. After selecting the delimiter, click “Next” to proceed.
Step 4
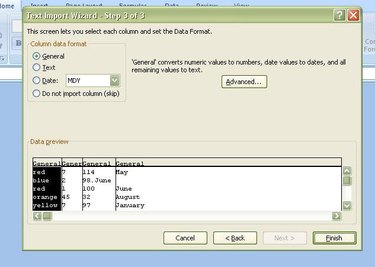
Assign the data format to each field that you are importing. The default data format is “General,” and this is the format you should keep unless any of your data fields contains dates or consists of data that you want to keep as text. Click “Next” to finish the import after you have finished assigning data formats to all fields.
Step 5
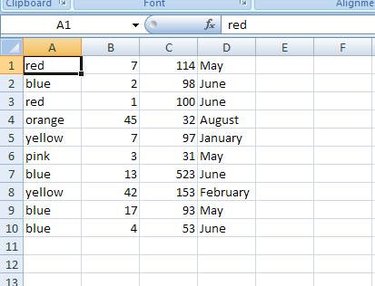
Save the resulting spreadsheet as an Excel file. Now you are ready to manipulate and study your data with the tools in Excel.