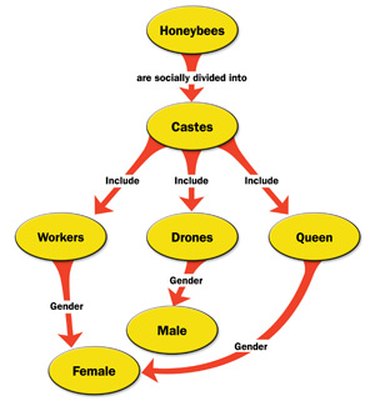
Concept maps can be used in planning a novel, story or even an essay of a few hundred words. The elements of concept maps link ideas that are related and should be dealt with in a particular order. A concept map is used to organize these ideas into a coherent structure so that a plan can be devised. Microsoft Word is a word processing program that has the ability to draw shapes. These shapes can be linked to create a concept map.
Step 1
Open Microsoft Word.
Video of the Day
Step 2
Insert a drawing canvas by clicking the "Insert" tab and selecting "Shapes" in the Illustrations group. Click "New Drawing Canvas."
Step 3
Select the "Insert" tab, click "Shapes" and choose "Oval" under the Basic Shapes section. Click and hold your mouse and drag your mouse to the size you want the circle. Hold the "Shift" key as you drag to keep your shape as a circle. This first shape is usually the main idea that you are starting from. The size can be adjusted by clicking the circle and dragging it from the edges.
Step 4
Type your concepts or ideas into the inside of each circle by right-clicking on the circle, selecting “Add Text” and typing in whatever your idea is.
Step 5
Repeat the process again and place the next circle with your next concept near the first circle. You can alter the size of the circle depending on how much importance you place on the concept.
Step 6
Link your concepts with either an arrow like a flow chart or a simple line. To use an arrow, click the "Shapes" button, choose the type of line you want under the Lines section.
Step 7
To connect shapes, click on the first shape and then click on the second shape.
Step 8
To draw a straight line, click "Line Button" image and drag to draw the line.
Step 9
If you need to change the length of any of the arrows or lines, click on the line and point to the circles that appear at the end, then drag them to the desired length.
Step 10
Repeat the process with other concepts to make your concept map.
Step 11
When you are finished, save your document.